
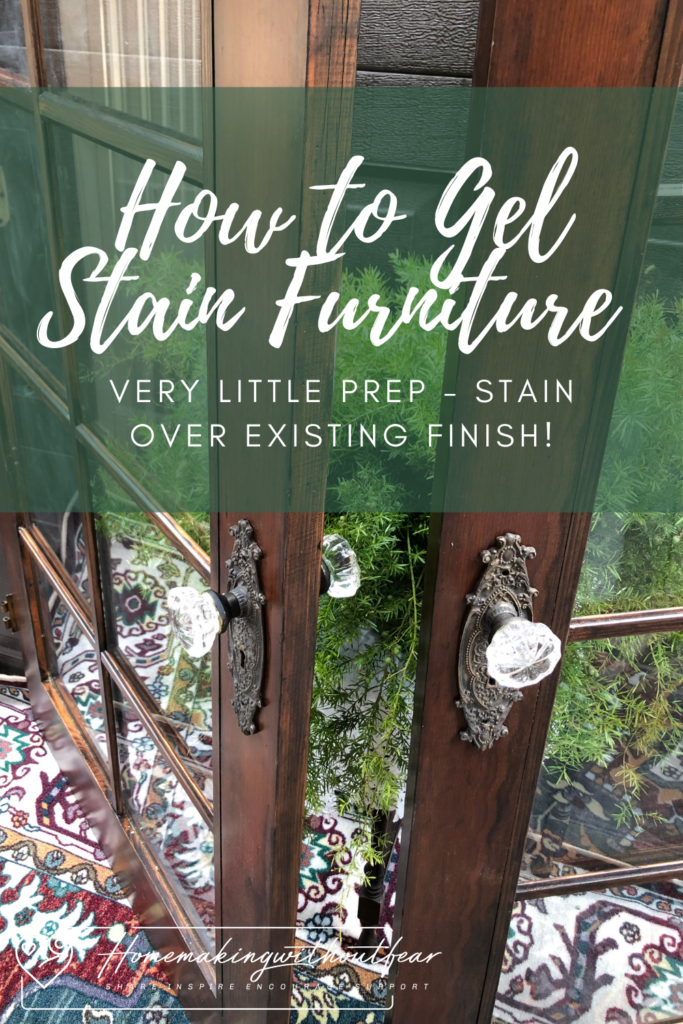
If you have been with me very long at all, you know how much I LOVE thrifting and finding antique treasures for my home. Beautiful doors give a home such character and charm. . . new doors can be expensive and many times old furniture and doors can be UGLY. I recently found French doors on FB Marketplace and you are going to love the transformation. The “secret” to making old doors or any wood furniture or cabinet beautiful is GEL STAIN. This method requires very little prep work! Stain right over an existing finish. Come along with me and learn how to Gel Stain ANY piece of wood furniture.

Maybe you are dreaming refinishing kitchen cabinetry to update your style? Maybe you would like to update said drab kitchen cabinets and your husband isn’t wild about you painting them! ((Why is this a thing with men??)
. . . Have NO FEAR!!! I have you covered.
Have you ever heard of gel stain? Gel stain is a thick gel like product (much like the consistency of pudding). It covers the surface of a wood piece instead of soaking in like a traditional wood stain. This allows you to EASILY add a beautiful, deep rich finish to ANY PIECE without a lot of fuss.
Why should you chose a gel stain for your furniture?
Gel stains are EASY TO USE – because they are thick, more like a paint they are a lot less messy. I would have no problem retaining kitchen cabinets without bothering with drop cloth. No drips or runs at all! – and y’all I am a messy painter so that says A LOT!
Gel stains allow you to STAIN OVER AN EXISTING FINISH – That is right! very little sanding and prep work involved. Simply buff (lightly scuff) the surface of your project with extra fine sanding sponge to clean up the surface a bit, wipe down with a 50/50 denatured alcohol & water mixture and get to staining.
Gel stains are LOWER ODOR – while it is still best to do projects outside with good ventilation, gel stains are not as stinky.
Gel stains are EASY TO APPLY – brush on the thick mixture in a very thin layer and rub/buff the stain into the wood with a clean lint-free cloth while wiping the excess away.
LITTLE GOES A LONG WAY – it takes very little product to get a beautiful result. A very thin layer is all you need – let it sit a few minutes and wipe the very little excess away.
How to Clean-up Gel Stain
Most Gel stain I use is oil-based so it does not clean up well with soap/water. You must use a paint thinner to clean brushes.
There are water based gel stains out there but I have not used them. . .
Therefore I recommend using an inexpensive brush or sponge applicator to apply the stain and wipe away with a lint free cloth, old towel or shop towels. Just plan to throw away used brushes and cloths.
What Gel Stain should you use for your furniture product?
I tried a new product and LOVED No Pain Gel Stain by Dixie Belle Paint Company in Colonial Black. I’m not sponsored by this company but just happen to love that they are a small family owned business from the SOUTH.
My husband is from North Carolina originally so part of our hearts still belong there.
I will definitely be getting and trying their chalk paint soon!

Here are some other gel stain options to check out:
How to Gel Stain Furniture or Cabinets
Gel staining furniture and cabinetry could not be easier. Working with a gel stain is much easier than traditional stain as it is thick, doesn’t drip or run and can be applied over an existing finish. Simply lightly sand/buff with extra find sanding sponge, wipe down well and get to staining. Here is how to do it.
Materials you will need to Gel Stain Furniture:
- Gel Stain of Choice
- Protective Finish of Choice
- Inexpensive Brushes or a Sponge Applicator to apply Gel Stain (these will be tossed)
- 1 Finish brush to apply Protective Finish
- Shop towels or lint free rags
- Spray Bottle
- Denatured Alcohol
- Magic Erasers
- Extra Fine Sanding sponges (180-220 grit)
- Masking tape
- Paint stir stick
- Vinyl gloves or this Staining Kit with Latex Gloves
Tools You May Need:
To make it easier on you I have created a complete Amazon Idea List/Cart for this project. Click the button below to go to the list and get everything you need for your gel staining project. (Make sure to pick your preferred gel stain brand and color!)
Step by Step Process of Gel Staining Furniture or Cabinets
Step 1: Using a screwdriver or drill remove all existing hardware.
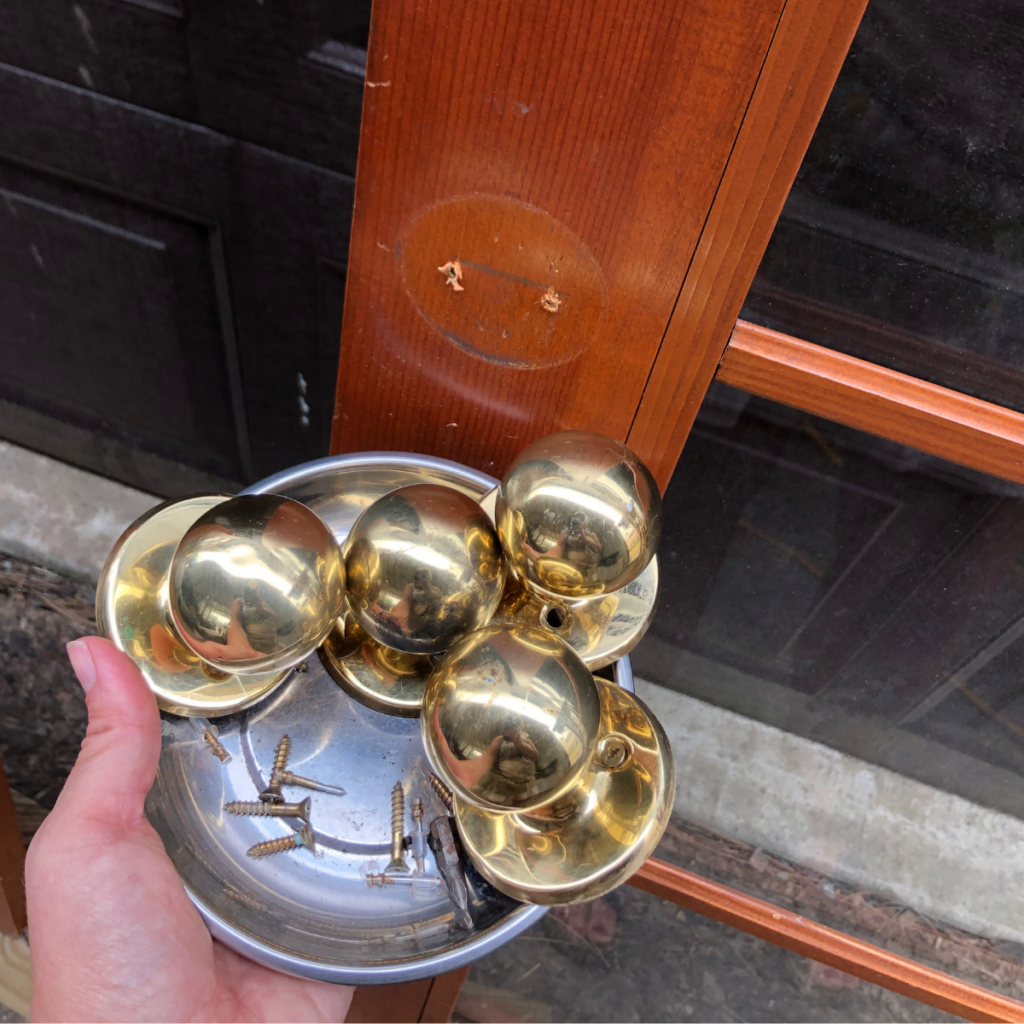
If you are gel staining cabinetry remove the doors and the handles. You don’t necessarily have to remove hinges. (your choice)
Step 2: Mask or Tape as needed.
Masking tape/wrap any areas that you do not want to get stain on.
Step 3: Light sanding.
Scuff/buff all wood surfaces with the sanding sponge. Make sure you sand WITH the grain of the wood not across the grain.
Step 4: Clean/wipe down project.
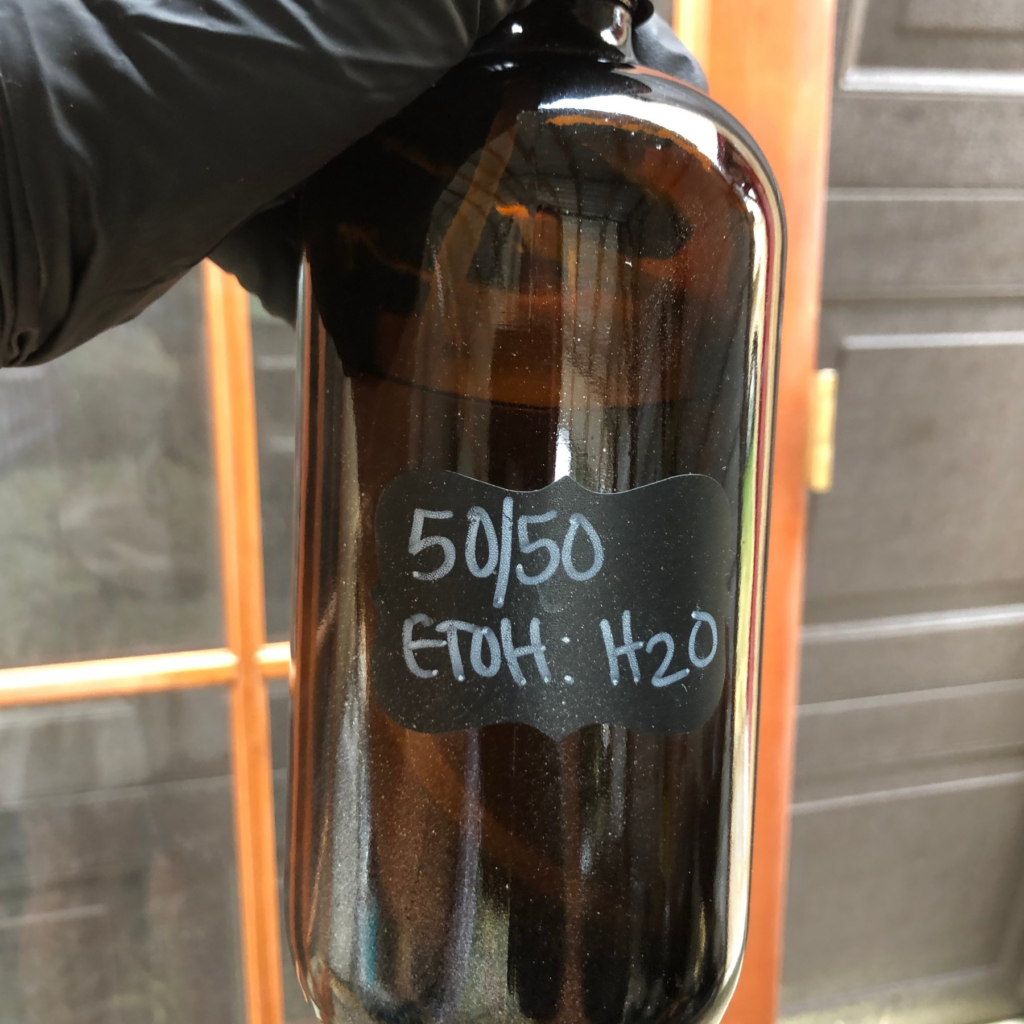
Lightly mist your project with 50/50 mix of denatured alcohol and water. Wipe all surfaces clean using a shop towel or lint free towel. Remove all sanding grit, oils or residues.
Step 5: Open and give your stain a mix.
Wearing gloves and clothing protection, open gel stain and give it a stir to make sure well mixed. (pigments don’t settle like a latex paint but still give it a mix!)
Step 6: Do a small test area and begin to apply stain.
Pick an area that is not obvious (back of cabinet door or a spot out of sight) to check the color and make sure it is what you are looking for. Apply gel stain with cheaper disposable brush or sponge applicator, working in small sections at a time. Make sure to apply product WITH the grain of the wood for best results.
Step 7: Remove Excess!
Wait a few minutes (do not let product dry on surface before rubbing and wiping excess) then gently massage/rub stain into the wood, feathering out the edges. Wipe and massage with the grain of the wood for best results.
Wipe away any excess stain with a clean shop towel or lint free rag.
Step 9: Repeat process in all sections, overlap edges.
Repeat process until all sections/areas are stained – overlap sections slightly to blend well.
Step 10: Let dry and reapply second coat if desired.
Let dry between coats (read gel stain label for guidance on how long to dry between second coat) . . . If you are happy with the first coat color then let the project dry completely to prepare for a topcoat of protective finish.
Step 11: Reapply coats as desired.
Apply second and even third coats as desired.
Step 12: Let dry & Cure.
Once desired color is achieved let project DRY COMPLETELY (read can label for instructions on how long to let dry/cure before applying a topcoat of protective sealer)
Step 13: Apply a topcoat finish for added protection. For High traffic areas you may need multiple topcoats, drying in between.
Apply a topcoat of protective sealer/finish of choice as directed on product label.
Step 14: Clean up project.
Remove any masking tape and clean any gel stain that may have gotten on glass or metal pieces ( a baby wipe or magic eraser works great for this)
Step 15: Reassemble as needed.
Reassemble furniture project or cabinet and apply any hardware that was removed.
Now is a great time to update hardware or apply beautiful details!


Come along with me as I gel stain and add antique charm to these BEAUTIFUL French Doors. WATCH the FULL process on YouTube.
What You Should Know: Gel Staining Furniture or Cabinets
Although gel stain has a lot less fumes, I always recommend painting/staining in well ventilated areas.
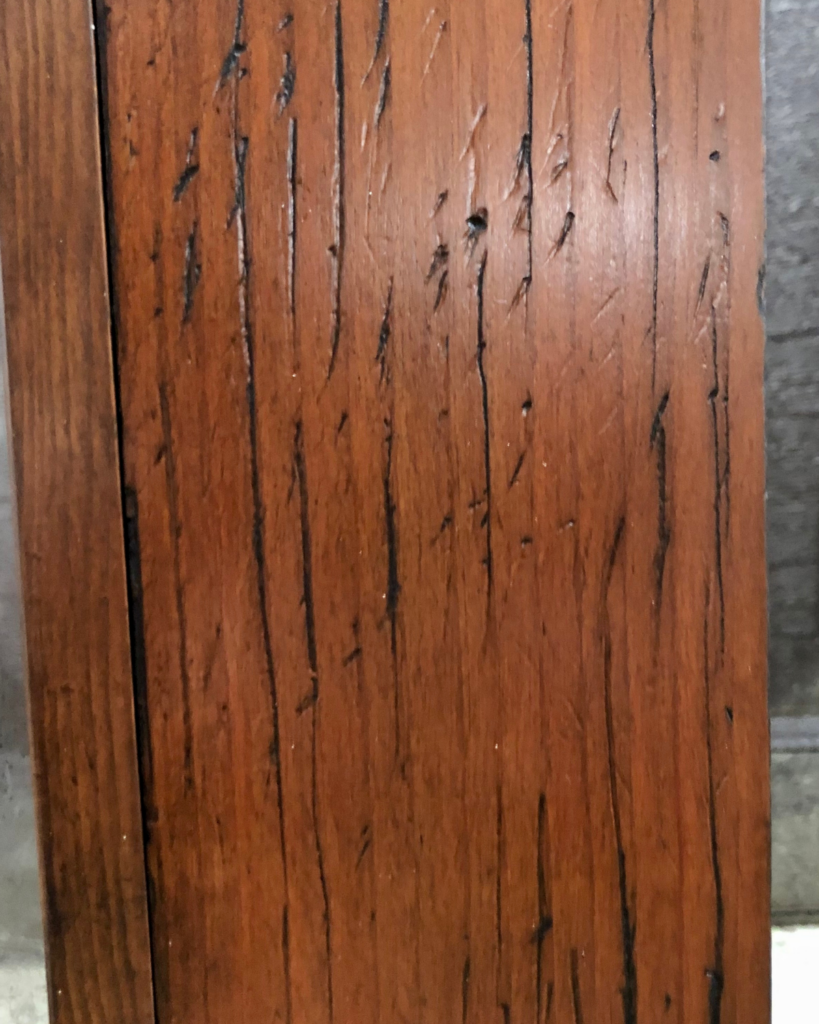
Do not worry about sanding perfectly. This is the MAGIC of gel staining. Because the product rides on the surface of existing finish it will get into all the little nicks and cracks and just creates GORGEOUS character in the resulting finish.
Gel stain wipes off fairly easily from glass and metal even when it is dried so you don’t have to be too precise with masking or taping off areas you don’t want stained. A magic eraser works great to remove these areas.
DO NOT apply a protective finish until project is completely dry especially if using water based finish topcoat over an oil based stain.
Oil based gel stains are difficult to clean up from brushes and clothes so I recommend inexpensive applicators and plan to throw them out.
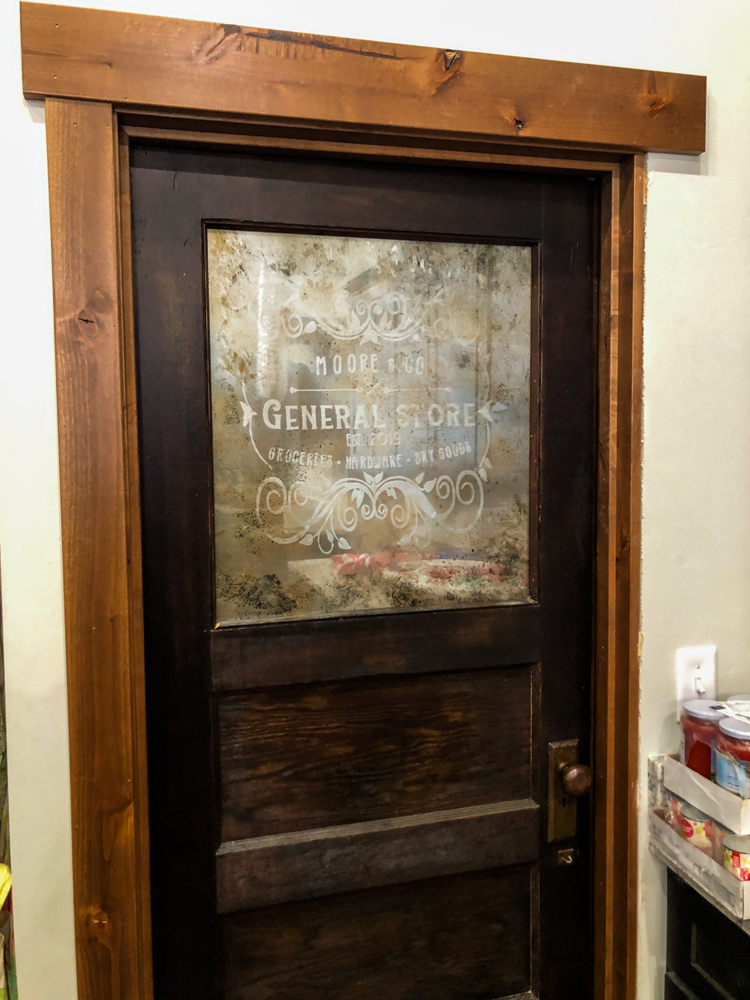
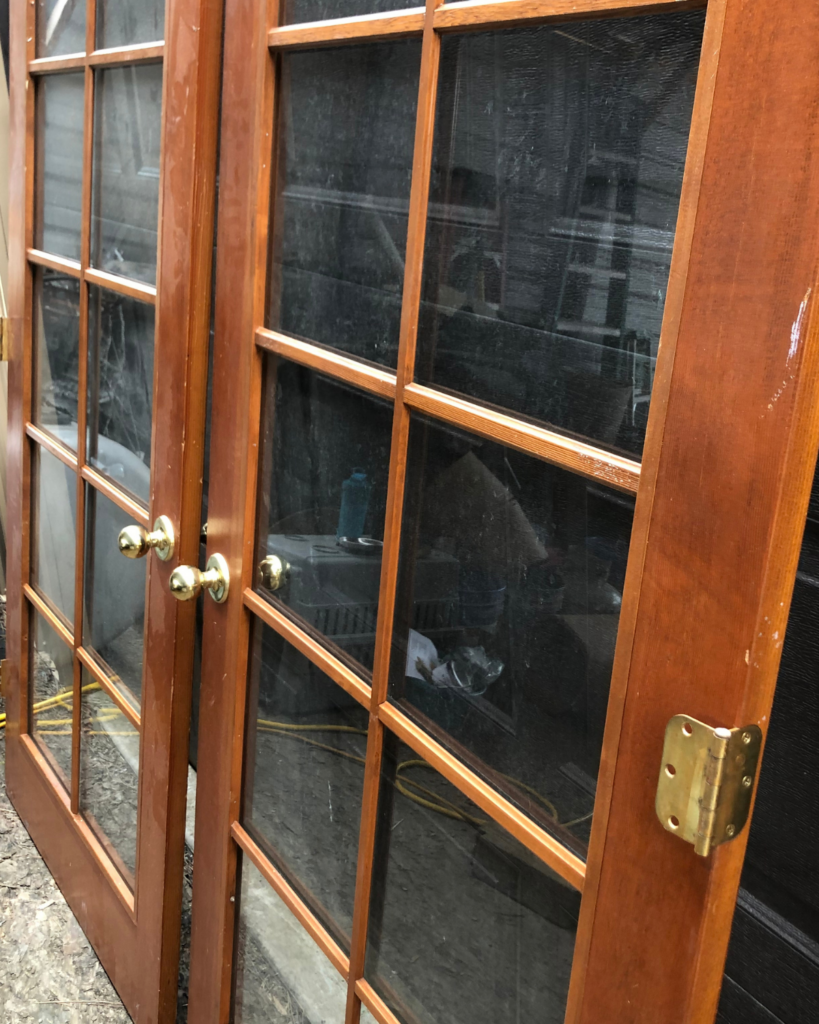
How to Gel Stain Furniture: How I gave my French Doors antique charm.

I chose to apply this gel stain method recently on some French doors that I found on Facebook Marketplace.
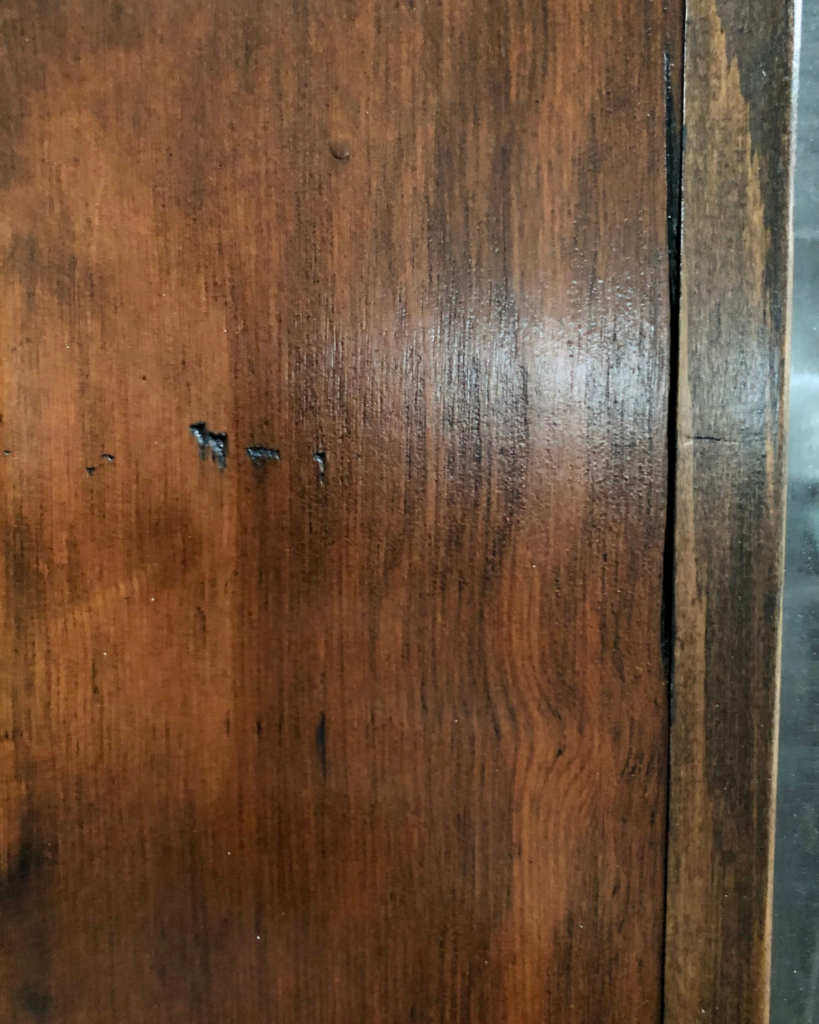
While I love OLD things I don’t necessarily love “new” old things and wanted to give these doors more interest, character and detail.
I didn’t like the bright orange existing finish of the doors so I chose a deep, rich stain color (Colonial black) from Dixie Bell Paint Company. After that, I simply prepared them by buffing with an extra fine 220 grit sanding sponge, wiping clean with the denatured alcohol/water mixture and rubbing on my gel stain.
While the whole process start to finish took about 3 full baby naps (I have a 13 month old and therefore must work on projects during nap time!) – I know all you Mamas get me.
It was not difficult at all and better yet very little mess!

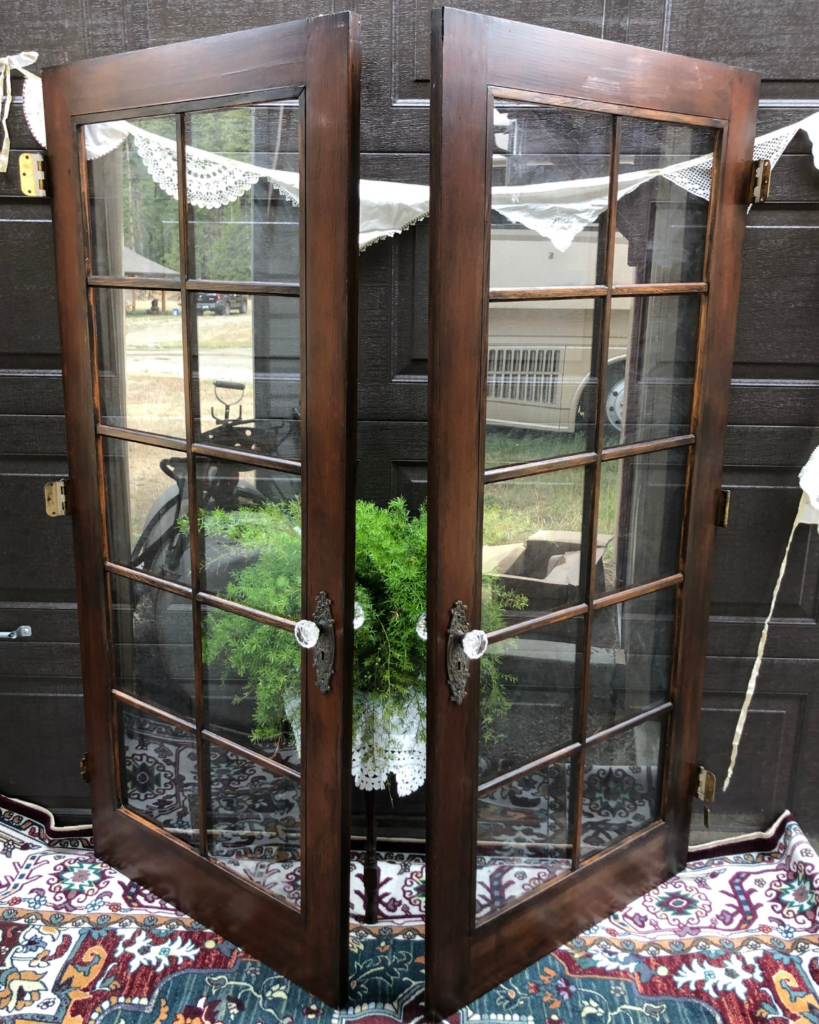
You can see for yourself what a difference it made!!
I ended up applying 2 thin coats after letting each coat dry completely in between.
I sealed it with a waterbased Polycrylic in Clear Satin . . .The “trick” with using a water based sealer over an oil based product is letting the stain dry COMPLETELY . . Otherwise the stain may rub off and mix with the finish.
I prefer Polycrylic over a oil based protective finish because it isn’t sticky, is easy to apply and to clean up, low odor and goes on milky but dries statin clear.
If you have a high traffic area/ furniture piece to do you may want want to research a more durable protective finish to apply as a topcoat. I wanted to give these doors a satin finish but they are definitely LOW traffic.
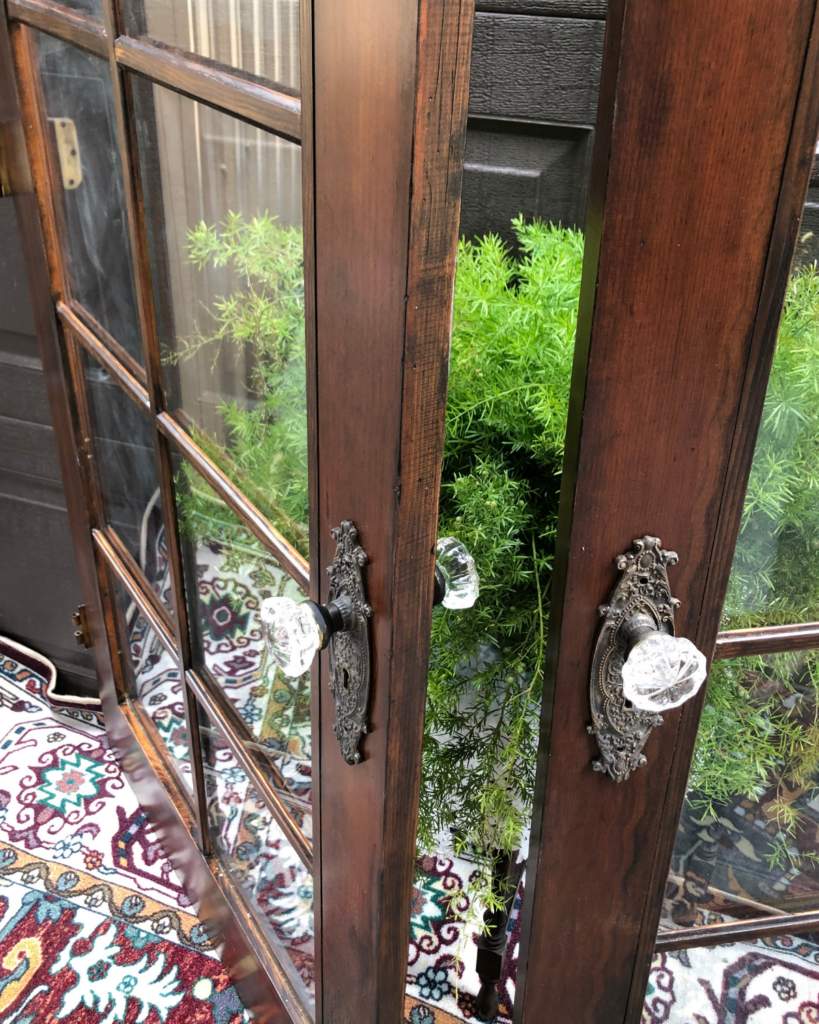
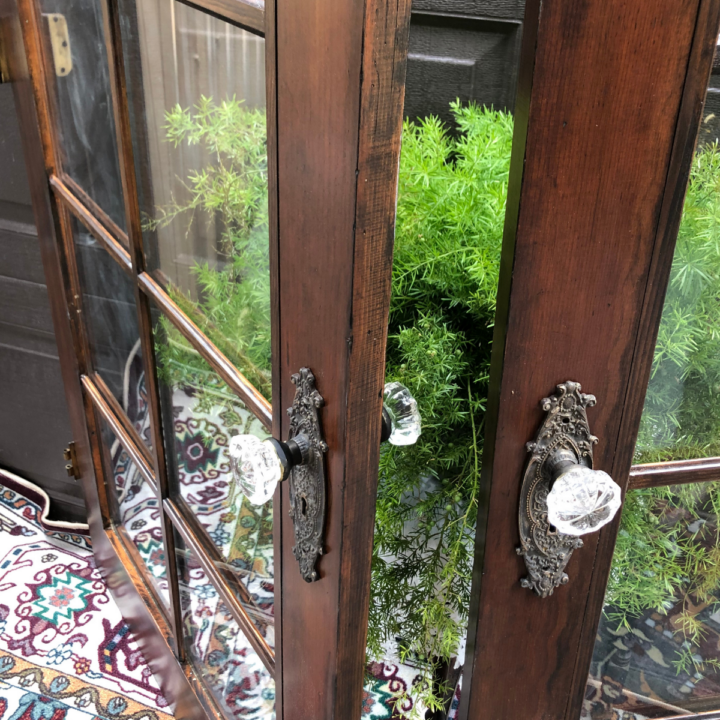
To finish them off, I added GORGEOUS backplates that I found on Etsy and glass/crystal replica door knobs from Amazon. I have linked below similar backplates from Amazon as well.

I LOVE THE RESULT and Hope you do too!
Hey Friend,
I would love for you to try this project on your furniture or cabinetry that needs a little upgrade. Be sure to tag me on Instagram @homemaking_without_fear if you do. I would love to share your results! Please comment below and let me know what you think and ask me any questions you may have.
Shop this Post:
I have made an Amazon list especially for HOW TO GEL STAIN FURNITURE. Click on the link or button below to add supplies to your Amazon cart. Add and delete items as you need or like.
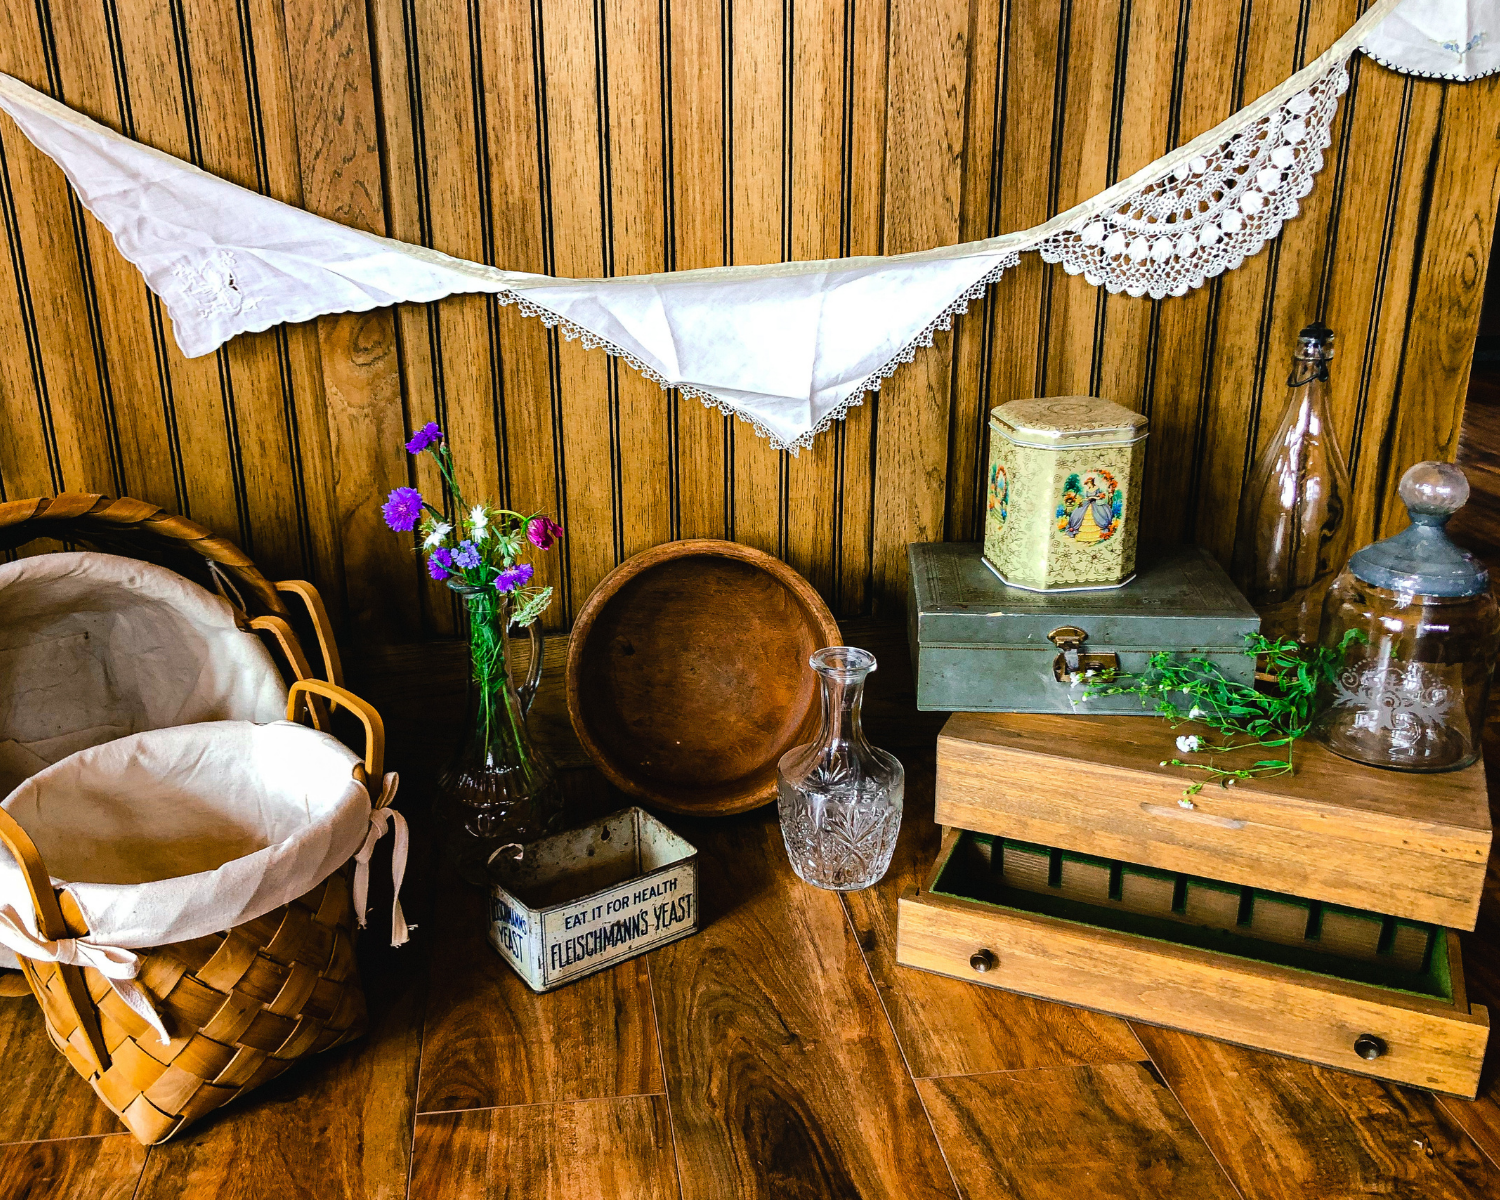
I think you will really enjoy this post all about Thrift Shopping Decor for your Home.
Pin it for Later

How to Gel Stain Furniture or Cabinets
Gel staining furniture and cabinetry could not be easier. Working with a gel stain is much easier than traditional stain as it is thick, doesn't drip or run and can be applied over an existing finish. Simply lightly sand/buff, wipe down well and get to staining. Here is how to do it.
Materials
- Gel Stain of Choice
- Protective Finish of Choice
- Inexpensive Brushes or paint sponge applicator to apply Gel Stain (these will be tossed)
- 1 Finish brush to apply Protective Finish
- Shop towels or lint free rags
- Spray Bottle
- Denatured Alcohol
- Magic Erasers
- Sanding sponges (180-220 grit)
- Masking tape
- Paint stick
- Vinyl gloves
Tools
- Screwdriver
- Magnetic tray
- Drill with bits
Instructions
- Using a screwdriver or drill remove all existing hardware. If you are gel staining cabinetry remove the doors and the handles. You don't neccessarily have to remove hinges (your choice)
- Masking tape/wrap any areas that you do not want to get stain on.
- Scuff/buff all wood surfaces with the sanding sponge. Make sure you sand WITH the grain of the wood.
- Lightly mist with 50/50 mix of denatured alcohol and water. and wipe all surface clean using a shop towel or lint free towel. Remove all sanding grit, oils or residues.
- Wearing gloves and clothing protection, open gel stain and give it a stir to make sure well mixed. (pigments don't settle like a latex paint but still give it a mix!)
- Pick a spot on your project that isn't super noticeable and do a test spot of stain. If you are happy with the color, apply gel stain with cheaper disposable brush or sponge applicator, working in small sections at a time.
- Wait a few minutes (do not let product dry on surface) then gently massage/rub stain into the wood, feathering out the edges.
- Wipe away any excess stain with a clean shop towel.
- Repeat process until all sections/areas are stained - overlap sections slightly to blend well.
- Let dry between coats (read gel stain label for guidance on how long to dry between second coat)
- Apply second and even third coats as desired.
- Once desired color is achieved let project DRY COMPLETELY (read stain can label for instructions on how long to let dry/cure before applying a topcoat of protective sealer)
- Apply protective sealer/finish of choice as directed on product label.
- Remove any masking tape and clean any gel stain that may have gotten on glass or metal pieces ( a baby wipe or magic eraser works great for this)
- Reassemble furniture project or cabinet and re-attach any hardware that was removed. Now is a great time to update hardware or apply beautiful details!
Notes
Although gel stain has a lot less fumes, I always recommend painting/staining in well ventilated areas.
Gel stain wipes off fairly easily from glass and metal even when it is dried so you don't have to be too precise with masking or taping off areas you don't want stained. A magic eraser works great to remove these areas.
DO NOT apply a protective finish until project is completely dry especially if using a oil based stain and a water based finish sealer.
Oil based gel stains are difficult to clean up so I toss brushes.